

Mounting on plasterboard wall often makes even the most confident decorator pause. You can’t trust the wall to hold heavy objects with a regular screw, and nobody wants the sound of cracked plaster or the sinking sight of their TV weighing into a soft spot. It’s a familiar worry—especially in homes with quick-build walls or when you’re not sure what’s hidden underneath the paint.
By the end of this guide, you’ll understand exactly how to tell what’s behind your plasterboard, which fixings to pick for TVs, shelves, and art, and how to keep the wall safe. This works especially well in a rental living room when you want to hang a large framed print without risking cracks or messy repairs, because you stay adaptable but still create a thoughtful display.
The short version: Mounting on plasterboard wall safely means matching the right fixing to your wall type and object weight, since standard screws often fail in soft board. By spotting studs, using proven anchors, and preparing with care, you can securely hang TVs or shelves without damage or stress.
Key takeaways
- Standard screws do not hold well in plasterboard because the board’s softness causes the screw to pull free under weight.
- Stud walls are safest for heavy items, while dot & dab or dry-lined walls need masonry fixings.
- For loads between 5 and 20 kg, hollow wall anchors (Molly bolts) spread the weight for secure fixing.
- Always check the wall type before drilling—look for studs, brick, or gaps by tapping or using a stud finder.

Why does plasterboard need special fixings?
A plasterboard wall crumbles easily, so it cannot take weight from regular screws without special fixings that spread the load and grip behind the board.
In a sitting room with plasterboard walls, hanging anything heavier than a small frame can feel risky. If you use a standard screw or nail, the board can break away, leaving a ragged hole and a dropped item. The problem is more serious as the object gets heavier.
Standard screws fail in plasterboard because they cannot distribute the load and the material crumbles, according to Neasden Hardware. Plasterboard is not designed for direct load—it’s meant to give you a smooth surface, not act as a support.
Unlike solid walls, which press back, plasterboard on its own flexes and breaks. If you want your shelf or TV to stay up, you need anchors that dig in and grip at the back, so the force pulls against a wider area instead of cutting into soft board. This is the cause-and-effect that separates frustrating repairs from trusted fixes.
A wall feels sturdier and safer once you use the kind of fixing that matches the load. For example, a secure anchor reduces wobbles and stops cracks from spreading around the hole.
How can you tell what’s behind your plasterboard wall?
Checking what is behind your plasterboard wall matters, because studs or bricks can hold more weight than empty gaps, making your choice of fixing much simpler.
In many UK homes, the wall you see might be hiding wooden studs, a block wall, or just empty cavity. You can start by knocking gently along the surface—solid sounds mean studs or brick, hollow sounds mark the gaps. Where a socket is fitted, there’s often a stud: sockets are usually fixed to something firm.
A stud finder makes life easier. It locates the vertical wooden beams in stud walls. If you don’t have one, small pins or a bradawl can help detect differences: pushing into a stud feels firm, while pushing through a gap meets little resistance. If the board feels cold in the middle but warm at the ends (where the studs run), you’re dealing with dry-lining on an outside wall—dot & dab is likely.
Compared to walls with clear sound and resistance, pure hollow board needs the most careful fixing. A shelf hung in the wrong spot falls early, while the same shelf over a stud holds firm for years. Knowing your wall’s build helps you plan not just for safety, but for future flexibility in rearranging displays or moving TVs to new spots.
The habit of checking saves hours later. Mark the stud, tap gently, and you’ll avoid many hidden problems.
Where this works best
Mounting on plasterboard wall works best in rooms where solid walls are not available, but careful fixing allows safe display of shelves, TVs, or art.
Bedrooms with thin interior walls, rental flats with dry-lined surfaces, or attics converted with stud partitions all use plasterboard. These settings rarely allow for risky drilling. Instead, you make the best of the materials you have, choosing spots where anchors can lock in or, if you’re lucky, wood behind the board can take the strain.
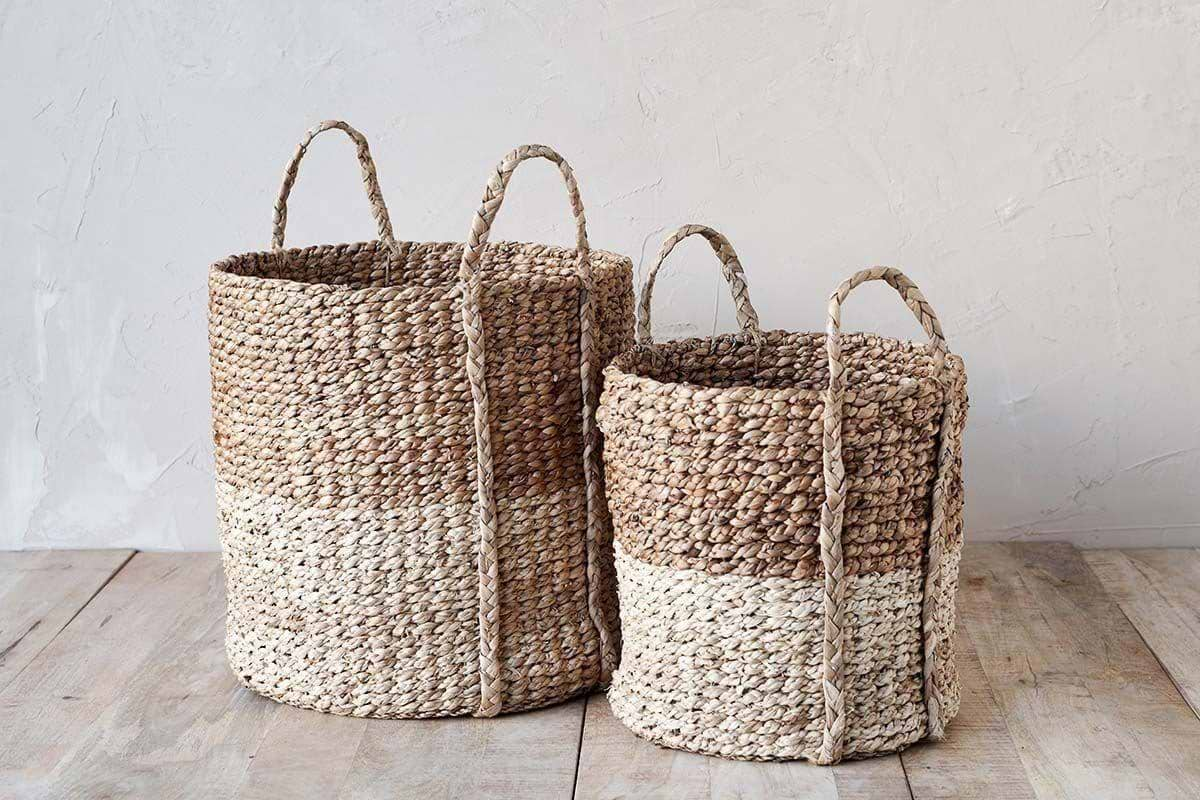
In a child’s room, you might want to secure a bookshelf. In a hallway, you hang family photos as a gallery. A decorative hook holds a Nkomi Basket for keys and gloves. These are all scenarios where plasterboard needs the right approach.
Avoid hanging very heavy objects on pure hollow sections—without studs or brick, the wall simply won’t last. Try to keep larger, heavier items like a big wall mirror anchored into firm points, such as studs or blockwork hiding behind the board. Loads over typical shelf weight need the wall to back them up, not just plasterboard.
Light, repeated weight—like a coat rack in a busy hall—stresses plasterboard more than a still, balanced frame. That’s why placement and fixing type matter most in these rooms.
What fixings should you use for different weights?
The type of fixing you pick depends on the weight of the item and the wall’s construction—hollow anchors, toggles, or specialist plugs all spread weight better than a plain screw.
For shelves holding soft items or small decor, a plasterboard plug often suffices. These twist into the board and let you screw into them directly; they’re best for lighter loads. For medium loads, hollow wall anchors or Molly bolts grab the back side of the board—a design that spreads the force so the wall stays intact.
TVs or deep floating shelves need toggle bolts or specialist systems like Expandet or Rigifix. According to the Expandet system, a single mount can secure TVs up to about 20 kg safely on proper plasterboard. For dot & dab or dry-lined walls, Rigifix is designed to grip the brick hidden behind.
Compared with self-drill plugs, a toggle bolt lets the fixing hinge behind the board, holding in place much better for heavy pieces. This difference in grip is what keeps a loaded shelf up long term. The principle is always the same: the larger and more evenly you spread the load, the less risk for the wall or whatever you hang.
| Fixing Type | Best For | Common Use |
|---|---|---|
| Self-drill plug | Light loads | Small frames, hooks |
| Molly bolt (hollow wall anchor) | Medium loads | Slim shelves, mirrors |
| Toggle bolt | Heavy loads | TV brackets, deep shelves |
| Rigifix | Solid wall behind board | Very heavy, dot & dab walls |
To avoid an uneven gallery wall, don’t mix different fixing types in one row—stability will vary, and frames may tip over time.

How to mount a TV or shelf without damage
For mounting a TV or shelf on plasterboard, always anchor into studs or use a fixing designed for the wall type and item weight.
Start by marking the spot. Use a stud finder to check for wood behind, as a stud wall holds much more than pure plasterboard. For a flat TV bracket, always aim to screw into at least two vertical studs when possible, as TV Wall Brackets recommend. The VESA mount pattern on most TVs fits this principle well.
If you hit a hollow patch, go for a hollow wall anchor or a toggle bolt. For dot & dab or dry-lined walls, a Rigifix grips into the blockwork. Unlike plain plastic plugs, both Molly bolts and toggles mushroom or spring at the back, keeping them solid under load.
Once fitted, test with a gentle upward pull before trusting expensive kit or deep storage to the new shelf. Compared to shelves simply pegged into pure plasterboard, shelves backed by the right anchors stay steady season after season.
If you run into an off-centre stud or gaps between mount holes and available fixing points, timber batten is an option. Screw the batten into two studs, then fix the TV bracket or shelf onto the batten itself. This trick spreads out the load safely.
Styling and placement
A well-placed object on a plasterboard wall draws the eye gently and feels considered, not thrown together, especially when the fixing is neat and hidden.
Choose a spot that acts as a visual pause in the room: over a sideboard, behind the sofa, or beside an entryway for the Nkomi Basket. Plan the layout before making any holes, laying out objects on the floor or with masking tape on the wall for soft trial runs.
If the room is busy with patterns or bold furniture, pick a quiet area for the wall object—a white wall, a linen curtain nearby, natural jute or clay. Compared to hanging over a radiator or a tangled cable area, a simple wall with calm lighting suits baskets, shelves, decorative wall shelves, or mirrors best.
Quick calm checklist:
- Stick to natural materials—jute, wood, or clay—since they add interest without making the wall feel busy.
- Check for spacing: leave gaps between items, rather than lining up edge to edge.
- Limit the palette around the object; one or two main colours keep the eye settled.
- Make a single piece the focus in smaller rooms, avoiding competing strong shapes on the same wall.
Everyday use reveals why grouping matters: a bare shelf reads colder than one with a woven basket and a plant, but crowding makes the shelf feel heavy.
What are the most common mounting mistakes—and fixes?
The most common mistake in mounting on plasterboard wall is using the wrong fixing or missing the stud, leading to slips, cracks and objects coming loose.
Hanging a mirror or shelf only to see it dip or wobble is familiar in many homes. The top error is skipping the wall check: not spotting the stud, using a regular plug in a hollow spot, or mixing fixings haphazardly. The result is usually a tilting shelf, or a damaged wall that’s harder to patch than before. Even a wall mirror can pull out if not anchored right.
The fixing spins in the hole, or the anchor pulls out with the screw—often from rushing, not pre-drilling, or drilling the hole too wide for the plug. Load distribution matters: too much force in one place and plasterboard breaks around the hole, turning a neat mount into a broken patch. For medium to heavy weights, Molly bolts or toggles avoid these problems.
Compared to carefully placed, matched fixings, quick-fix attempts end up costing more time and money. Give the job a pause, check wall type and load, and pick a single fixing style for all hangings in that room. A grouped approach works best when you draft before drilling and step back at each stage.
Choosing the right anchor calms the space visually, since fewer repairs mean fewer patched holes and a softer, more inviting wall over time.
There’s a moment—standing back after hanging a shelf or TV—when the room feels nearly right but something sits awkward. Often, it’s not the object, but the spacing, a visible plug, or a shadow cast in the wrong direction. A simple decision, like adjusting the height or grouping one focal object instead of scattering, shifts the mood.
Many homes fall into the trap of rushing the fixing—throwing up a TV with the nearest plug or loading up a shelf without checking the board. The result is a wall that feels temporary or even fragile, which can add a subtle unease day-to-day. Catching this early leads to a steadier, less cluttered feel that holds up to everyday use. Save this idea for later.
What tends to hold up with wall mounting and natural styling
Among hundreds of room photos and feedback from professional installers, one pattern is clear: slow, planned placement works better than fast fixes. Fixings that grip from behind the plasterboard or reach a stud last much longer, so decorators and reviewers consistently recommend hollow wall anchors or toggles for heavier loads. Matte finishes get recommended again and again for shelves near windows, because they don’t catch glare the way a glossy tray does.
Hanging natural materials—like jute baskets or wooden shelves—directly on a clean wall makes it look lighter and less busy. A single statement piece, with space to breathe, draws the eye with less visual effort. Small changes in anchor choice and arrangement shape how calm or settled a room feels by the end of the day.
— Mara, Loom & Glow
Common questions
Can a plasterboard wall hold a 50 inch TV?
A plasterboard wall can hold a 50 inch TV if you use proper fixings and, ideally, hit at least two vertical studs with the bracket. Using specialist anchors like the Expandet system also works up to about 20 kg, according to industry advice. Spread the weight, and check the wall before starting.
How to fix loose wall plugs in plasterboard?
To fix loose wall plugs in plasterboard, remove the old plug and fill the hole with ready-mixed filler or patching compound before redrilling a smaller hole close by. Relying on the same hole often leads to more damage. Always step up to a hollow wall anchor for a sturdy result if reusing the location.
How much weight can I hang on a plaster wall?
Most plasterboard walls take light to medium weights using the right fixings—up to about 20 kg with hollow wall anchors, less for basic plugs. For heavy loads, always chase a stud or use a specialist anchor. Avoid guessing; checking load limits keeps both object and wall safer.
How do I fix my Sky Glass TV to the wall?
You can fix a Sky Glass TV to the wall using a VESA-compatible bracket and anchors rated for the weight, aiming to hit at least two studs or use heavy-duty toggle bolts. Follow manufacturer instructions and verify your wall type before drilling. Taking time at each step ensures lasting results.
Explore more calm combinations inside our
Shop The Look
.
Free guide
The Calm Shelf
12 styling ideas to help you compose calm, balanced shelves in natural texture homes.