

Too often, busy kitchens and family tables take on the feel of a drop zone: school papers, charger cables, and plastic odds and ends. Homemade air dry clay, simple as it is, won’t fix everything—but it does offer a steady, hands-on project that shifts the tone of a common day. Setting out the ingredients invites even tired hands to pause and knead, if only for a few minutes.
Today’s guide walks you through how to make one small, concrete change: mixing, shaping, and drying a batch of homemade air dry clay. You’ll swap scattered, distracting clutter for one quiet, ongoing ritual—one that quietly grows new shapes for slow living home decor. This works especially well in a rental kitchen when you want removable, soft crafts because nothing stains and all scraps tidy away fast.
The short version: Homemade air dry clay uses three kitchen basics—baking soda, cornstarch, and water—to make slow, no-bake crafts you can shape and dry at home. This quick recipe lets you create simple, natural pieces and gives your hands a reason to slow down midweek.
Key takeaways
- A basic homemade air dry clay recipe is made using water, cornstarch, and baking soda.
- Mixing pigment into the clay, instead of painting after, creates softer, more even color for mindful home decor.
- Homemade air dry clay shapes dry best when they are turned and trimmed for airflow.
- Most air dry clay objects benefit from sealing with a simple varnish or white glue solution when fully cured.
- Clay coasters, bowls, and ornaments work especially well for slow home ideas and calm home aesthetic projects.

What do you need to make homemade air dry clay?
Homemade air dry clay uses just three kitchen staples: baking soda, cornstarch, and water, according to One Little Project. Most people have these in the pantry already, making this a calm, everyday project.
For a slow living home, the most common version uses water, baking soda (or bicarbonate of soda), and cornstarch or cornflour. These combine quickly on the stove, forming a smooth paste that cools into workable clay. People who like to avoid plastics or strong-smelling glues often choose this type because cleanup is gentle and surfaces stay safe for food.
A cramped apartment with only one good mixing bowl can still handle this recipe. Unlike store-bought clays that dry out quickly or stain, this clay can be set up and put away using what you already have. The soft mixing process fits into a mindful home decor project: not too loud, not sticky, easy to pause and resume.
Compared to polymer or salt doughs, baking soda clay leaves a cleaner finish and lighter color. A lumpy, salt-heavy dough feels heavy and gritty on the hands, while this basic air dry clay remains smoother and cool to the touch.
Use this for slow home ideas that need uncomplicated, lightweight pieces—such as bowls, tags, or coasters for a coffee table or work nook.
How do you mix and knead homemade air dry clay?
Mixing homemade air dry clay takes about ten minutes on the stove, and kneading by hand gives the final texture a firm, elastic feel. The right ratio keeps the clay pliable and limits cracking as it dries.
Start by mixing baking soda and cornstarch in a roomy pot, adding cold water little by little. A common recipe uses two parts baking soda to one part cornstarch, plus just enough water to loosen it (That Art Teacher shares an exact ratio if needed). Stir over low-medium heat while the mixture thickens and pulls away from the sides—stop when it looks like mashed potatoes. Let it cool in the pot or between parchment sheets until cool to the touch.
Kneading by hand is essential. Dust the counter with a bit of cornstarch to prevent sticking and knead for a few minutes until smooth and stretchy. If the clay breaks or crumbles, add a teaspoon of water at a time and work it back in. Unlike flour-based dough, this clay is less grainy and stays light beneath the palms as you press it out. A warm kitchen helps the mixture stay workable for longer; a dry, drafty room can stiffen it faster.
Once kneaded, wrap any extra in a clean cloth or plastic wrap to prevent it from drying out before shaping. Store-bought clays can be sticky and leave residue, but homemade air dry clay usually leaves the hands clean.
Shape bowls, beads, or ornaments for an intentional living home project—these small forms dry uniformly on a tray near a window.
How to prevent cracking as air dry clay cures?
Cracking usually happens when homemade air dry clay dries too fast or too thick, but steady air and careful turning keep the surface smooth. Thin shapes dry best with good airflow and minimal direct sun.
For most projects, the biggest issue is uneven drying. Leaving thick items in a hot spot—like above a radiator—pulls moisture out too quickly, causing cracks down the middle. It helps to keep items in a spot with daylight but no strong sunlight. Fan-forced heat dries the outside fast while the inside stays soft, leading to splits.
A simple rule: A homemade air dry clay object dries best when it is flipped every few hours in a well-ventilated room. Placing pieces on a rack or mesh tray makes this easier. Small coasters or ornaments sometimes dry within a day or two, but larger bowls or vases may take longer. Patience makes a real difference. Trimming the edges while still soft prevents rough, crumbly rims after curing.
Unlike heavy salt dough, which tends to shrink unpredictably, homemade air dry clay stays more consistent if handled gently. Adding too much water when mixing causes soft spots, while overcooking makes the clay brittle. Learning the right texture matters more than measuring out by the gram.
Try this method with flat shapes for hygge home decor where even a beginner can avoid frustration—not every piece needs to look perfect, but smooth edges catch the eye on shelves and sills.
Where this works best
Homemade air dry clay is well-suited to calm, shared spaces—coffee tables, sideboards, or kitchen shelves—and works best when everyday clutter is cleared first. The material’s pale color and soft finish make it a natural fit for a calm home aesthetic.
In rental kitchens, small apartments, or rooms with little storage, air dry clay projects provide light, removable accents that don’t require hooks or drills. Bowls for keys, vases for dried stems, or simple trays on the sideboard blend in quietly, especially in pale or neutral palettes. This suits anyone avoiding permanent changes or fussy tools.
Avoid putting homemade air dry clay in damp bathrooms or outdoor areas where humidity changes fast. Water weakens finished shapes, and outdoor sun can make surfaces warp. For soft, subtle effect, keep clay objects in rooms without direct water contact or steamy air—a shelf above a desk or by the front door works well. A bare corner becomes more welcoming with a single bowl, compared to one stacked with glossy, store-bought ceramics.
Use flat trays or shallow bowls for loose change or rings in bedrooms and hallways, anchoring a space without overwhelming it.

Can you color homemade air dry clay at home?
Homemade air dry clay takes color well from food dye, powdered pigments, or even spices added before mixing, and can also be painted after drying for different effects. Mixing pigment in creates a subtle, even tone ideal for slow living home decor.
If you want a soft, natural color, add a few drops of food coloring or a pinch of turmeric, cinnamon, or powdered oxide to the dry ingredients before combining with water. Unlike painting after drying, which can leave streaks or bold patches, mixing color at the start produces a uniform look. For bolder designs or patterns, let pieces dry fully and brush on simple acrylic paint or diluted gouache.
Homemade air dry clay picks up natural pigments quickly—compared to commercial, glue-based clays, which may resist some types. A swirl of blue or green works well for clay bowls that stand out on a pale shelf. By contrast, an uncolored clay bowl blends in, looking lighter and softer—useful when you want the piece to recede rather than become a focal point.
Finish colored pieces with a matte water-based varnish if you want to protect surfaces and prevent color transfer with daily use. For most slow home ideas, an unfinished, raw finish shows the hand-mixed texture best.
Try a batch of colored beads or discs for calm home aesthetic garland or mobiles, pairing against wood or natural linen for a soft look.
Styling and placement
Homemade air dry clay objects look best when spaced out, paired with wood or woven materials, and kept in the line of sight but not crowded. Limiting the palette and keeping shapes simple lets them breathe in the room.
Placement matters as much as the object itself. A row of homemade clay coasters on a coffee table keeps surfaces clear but won’t draw too much attention. A single bowl or dish in a small hallway invites daily use—resting loose keys or jewelry—not more.
A bare surface with too many different shapes or colors can look scattered. Instead, repeat the same shade or form: three similar bowls or matching white and soft green. Unlike glass or metal accents, clay is less reflective and mutes glare, especially near windows or lights. A dark, overly polished room benefits from these lighter, matte-finished objects.
Quick calm checklist:
- Use cornstarch clay shapes with unfinished wood, jute baskets, or woven trays.
- Limit your color palette to two natural tones or one pop of color only.
- Keep grouped objects to three or fewer on a tray or shelf, with clear space between.
- Choose shallow bowls, flat trays, and coasters that don’t block light.
- Repeat one clay texture for a slow, unified look—no busy blends.
For a mindful home decor touch, place a single air dry clay vase or cup on a side table where it catches mid-morning light.
How to store leftover homemade air dry clay
Leftover homemade air dry clay stores well in an airtight container or double-wrapped in plastic wrap to prevent drying. Small batches should be kept cool and away from direct sun to stay workable.
Many people finish their craft and forget about cleanup, but unused clay left on the counter dries hard within a day. To keep extra clay fresh for up to several days, wrap it tightly in cling film first, then in a reusable bag or small jar with a tight lid. Squeeze out all air before sealing. Unlike commercial clays, which contain preservatives, homemade versions can sometimes spoil if left damp for too long in warm rooms—if it smells sour, discard it and make a fresh batch.
Don’t put raw clay in the fridge—it attracts moisture and can go sticky, making it hard to handle. Instead, pick a cool, shaded drawer or high shelf away from the stove or radiator. Compared to open storage on a tray, sealed packs hold shape and texture so much better, letting you reuse leftovers for touch-ups or new projects tomorrow.
Store in single-use portions to avoid working with a hard lump. Flat discs are easier to revive than large balls—simply knead with damp fingers to restore softness for flexible shaping.
You can check out air dry clay projects for home if you want to see more storage-friendly shapes and ideas.
What tends to hold up with homemade clay projects
Air dry clay objects usually stand the test of time when kept in dry, stable rooms and handled gently. Many reviewers highlight how matte finishes work best for hand-shaped pieces—shiny topcoats can sometimes look out of place next to natural wood or stone. Bowls and trays made with the cornstarch and baking soda recipe rarely yellow or flake if sealed with clear glue or simple varnish, according to frequent home crafters. Most decorators agree that grouping too many different shapes on one shelf makes a space look unsteady, so single pieces or softly repeated shapes offer a slower, more practical look. Letting each shape dry fully prevents headaches down the line.
— Mara, Loom & Glow
Common questions
How do you make air dry clay at home?
To make air dry clay at home, combine baking soda, cornstarch, and water on the stove, then knead until smooth. This three-ingredient mixture creates a soft, pliable modeling clay. It’s quick and safe for most home surfaces, with a smooth finish perfect for simple, slow living crafts.
How to make air dry clay with 3 ingredients?
Air dry clay with 3 ingredients uses baking soda, cornstarch, and water, mixed and cooked until thick, then cooled and kneaded. This is the recipe most commonly recommended for calm home aesthetic and mindful crafts. A soft, neutral look makes it popular for beginner projects and family use.
What can I use instead of air dry clay?
Instead of air dry clay, you can use salt dough or paper mache for DIY sculpting and craft projects. Salt dough uses flour and salt, while paper mache layers paper with glue or paste. Both are widely used for home decor, but air dry clay leaves a smoother, lighter finish.
How to make air dry clay with 2 ingredients?
To make air dry clay with 2 ingredients, mix cornstarch and baking soda, gradually adding water as you heat and stir. This shortcut version works for quick, fun crafting, though adding water gradually is key for the right texture. The finished clay is soft and ideal for small projects.
Explore more calm combinations inside our Shop The Look .
Shop the Look
A few Nkuku pieces that show off handmade clay and sculptural finds.
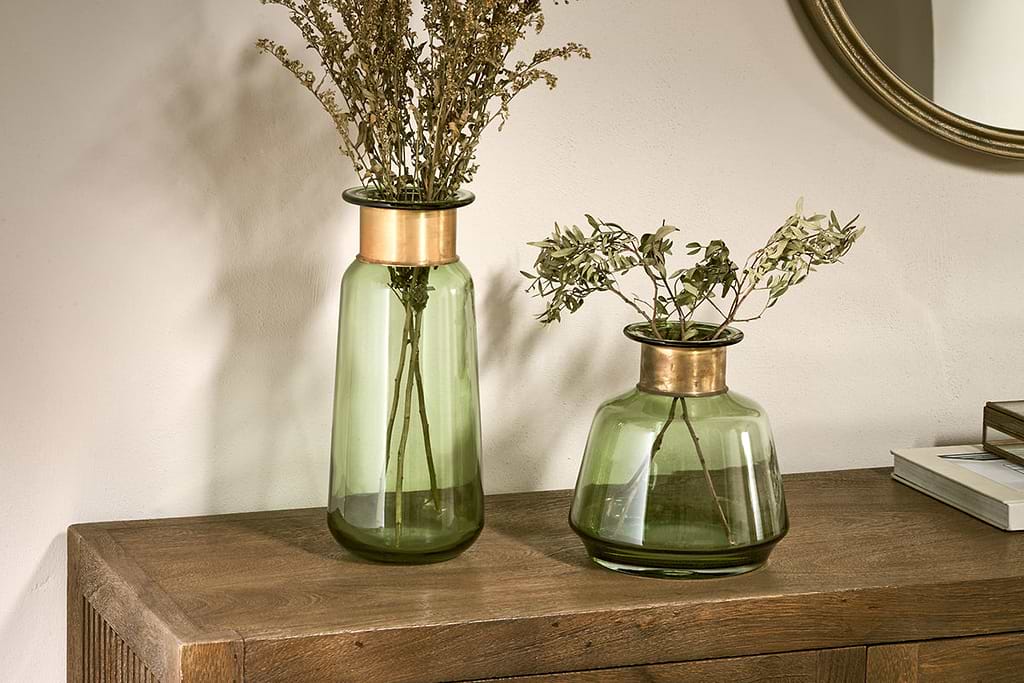
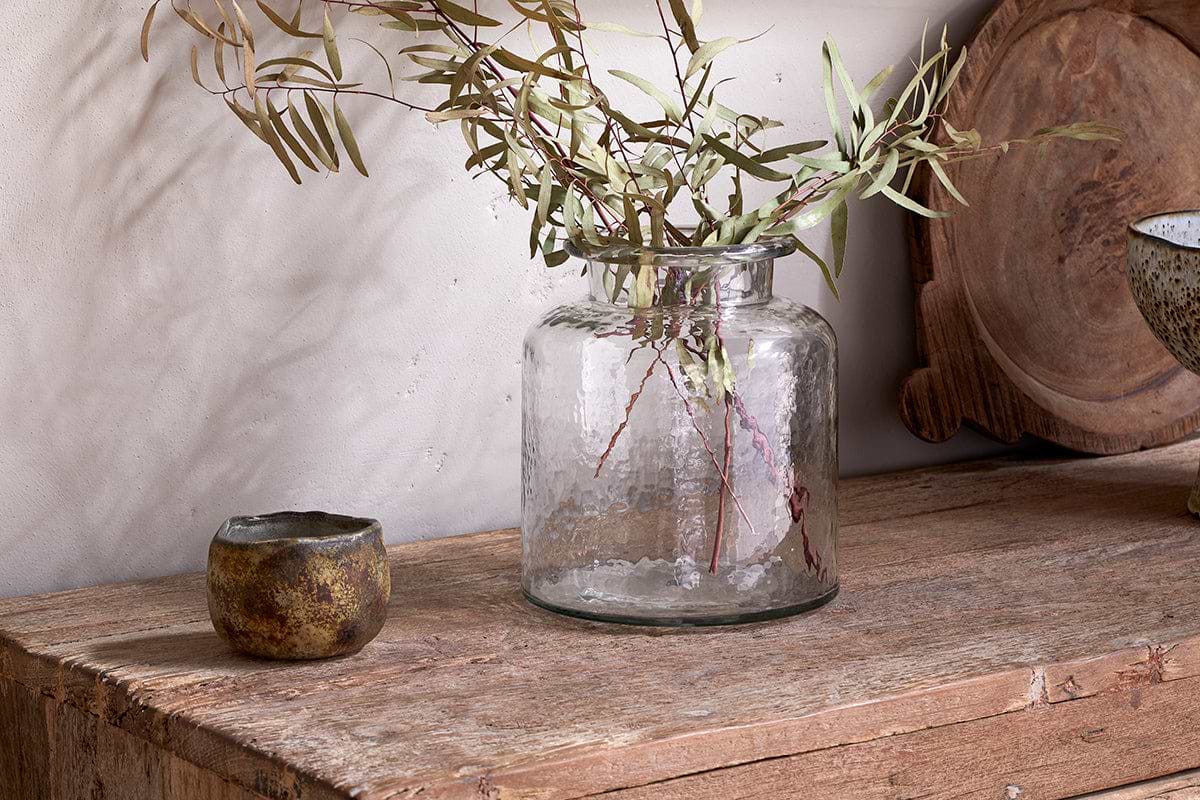
Akra Recycled Glass Vase
Clear cylindrical glass — pairs with stems or sits empty as a quiet accent.
View at Nkuku →Some links above are affiliate links. If you buy through them we may earn a small commission at no extra cost to you. We only suggest pieces we think fit a calm, lived-in home.
Free guide
The Calm Shelf
12 styling ideas to help you compose calm, balanced shelves in natural texture homes.