

If you have ever tried to follow a how to make a woven wall hanging tutorial from Pinterest, you might know this: even with the nicest supplies, the final piece can look messy or out of place. Most rooms already have too much going on, or not enough clear surfaces to show off anything handmade.
This guide gives you simple, step-by-step instructions that work in real apartments and family homes. You’ll learn what materials to choose, how to limit color, and the one design shift that makes handmade wall hangings look clean and calm. This works especially well in a small entryway when you have bare walls because it adds warmth without clutter or extra furniture.
The short version: To answer how to make a woven wall hanging for a calm, upscale look, start with just three to four natural materials, keep your palette tight, and focus on simple shapes. Even beginners can make something that feels clear and solid instead of busy, just by keeping each step pared back.

Do you need special tools or skills?
You do not need much experience or uncommon tools to start weaving a wall hanging, just basic supplies and natural fibers do the job. Simple cardboard looms and a kitchen fork work for most styles.
A small apartment or rental space rarely has a lot of storage for specialty craft supplies. You can finish most calm hanging projects with things you already have: a strip of cardboard for a loom, masking tape, and scissors. Use a fork to push down threads instead of a professional beater. This makes cleanup quicker, with no hard-to-store items left behind.
Relying on a few handy tools removes the intimidation factor for anyone who is new to weaving. The learning curve flattens out since you’re not juggling complicated gear. Instead, you focus on the look and feel of each row, which builds confidence and helps your work come out smoother.
In rooms with no work table, try weaving right on your lap or floor. Unlike projects that need lots of space, this approach fits city living and shared homes.
What materials give a wall hanging a natural look?
Natural-fiber yarn, cotton cords, and jute twine are the backbone of calm, handmade decor. Neutral wool, undyed rope, and plant-based fibers make the whole piece read softer and more grown up.
Bare walls in bright kitchens or bedrooms work best with materials that show some texture. Wool is soft but not shiny, while jute and sisal introduce a hint of roughness that anchors the hanging. Unlike glossy acrylic yarn, these choices take light gently and look more relaxed throughout the day.Linen threads add a crisp, dry touch, keeping the piece cool and not fuzzy, even in humid rooms.
Many DIY home decor natural materials, like driftwood or smooth dowels, help define the top of a wall hanging. Choosing a sturdy branch or sanded rod helps the work hang flat, so it doesn’t curl at the edges over time. Instead of plastic hoops or metal rods, these stay hidden and don’t add weight. For those sensitive to allergens, untreated cotton softens the look and keeps things easy to maintain.
The result is a project that feels handmade but not childish, even in a master bedroom or grownup living area.
What simple designs work for beginners?
Blocks, stripes, and fringe all work with basic weaving skills and a tight material range. Geometry, not complex patterns, keeps the look neat and forgiving for a first project.
L-shaped layouts, thick stripes, and long loops all build visual interest without endless pattern work. Working in straight lines keeps errors from piling up and lets your eye rest, even if you’re learning as you go. A wall hanging of just two panels, using bold horizontal blocks, feels solid, compared to loose, uneven shapes that can look unfinished.
Repeating one shape (such as rectangles, chevrons, or rows of fringe) instead of mixing many keeps the weight even and makes the finished piece calmer. Instead of switching colors and fibers at every row, use the same yarn for two or three runs before changing. This helps areas blend and stops the piece from feeling choppy.
Most beginners find that using less color avoids a childish look. Starting with a base of cream or tan, and adding no more than one accent color, makes the project feel grown up. Adding tassels or braids at the bottom, in the same material as the body, pulls the piece together.
How do you avoid a project looking cluttered?
Pick a single focus, such as one shape or color, and keep space around it. Empty space is as important as what you weave in.
Living rooms with open shelving or gallery walls often look crowded if the wall hanging is too busy. Instead, using large simple shapes and leaving gaps lets the wall breathe. This approach makes the handmade work feel calm, even beside books or framed art.
Spacing out color changes so stripes or blocks are wider than the gaps between them reduces visual noise. A wall hanging with lots of small, uneven patches feels fussy, clean lines work better for kitchens or studies that already have other objects in sight.
Compared to projects that mix many bright yarns or dangling beads, using a single family of colors (for example tans, whites, and browns) helps the piece fade quietly into the background, reducing clutter. For further reading on restraint and layering in craft home decor, see Wooden keepsake boxes simple storage with heart.

Where this works best
Woven wall hangings fit best on plain walls with some natural light and little else competing for attention. They soften entryways, bedrooms, and nooks with blank space.
Rooms that are boxy or have little built-in character, like hallways or small bedrooms, benefit from the rough edges and light texture of woven art. Entryways with bare walls often feel unfinished; here a woven wall hanging can fill the space without blocking light or taking up floorspace. Rental units that limit wall paint or hardware also work, since these hangings can go up with a single adhesive hook or small nail.
For daytime use, a woven wall piece on a sunlit wall feels different from glossy art or photos, catching soft daylight with no harsh reflections. A guest room or reading nook can feel warmer with a cotton or jute hanging, as opposed to leaving the space untouched and cold.
Avoid placing woven hangings near strong heat or cooking steam, as kitchen grease or humidity can settle into fibers. Unlike tile or metal art, natural fibers can stain or warp in damp rooms. Make sure to leave some distance between the wall hanging and water sources in bathrooms.
How to finish and hang your wall piece
Tie off all loose threads, secure the top to a smooth stick or rod, and give the bottom a straight edge or gentle fringe. Hang with a simple loop for the cleanest look.
Finishing the back of the project stops yarn ends from poking out over time. Knotting and weaving in stray pieces keeps the front tidy and prevents unravelling. If the piece hangs uneven, gently pulling each row into line gets it to sit flat on the wall.
Attaching the finished weaving to a wood dowel, branch, or metal rod prevents sagging and lets the whole thing hang in one flat plane. Most hardware stores carry light dowels that cost a few dollars and can be trimmed to fit your work. Or, for a more natural look, sand a thin branch and secure the weaving with strong twine.
Compared to large frames or heavy mounting, a woven piece weighs little and stays put with a small hook or removable strip. This keeps walls free of major holes and works well for renters. For design inspiration on layerable soft art, see linen wall banners minimal art for quiet interiors.
Styling and placement
Aim for a quiet look by spacing your hanging away from other artwork, keeping nearby decor simple, and using only two to three colors. The right placement can add interest without noise.
Choose a spot above a bench or console, or on a blank wall facing a window, so the piece is visible but not crowded by shelves or big furniture. Soft natural light helps bring out the fiber’s warmth, while harsh overhead lighting can make textures look flat. Placement at eye level works better than hanging too high or too low, midway between floor and ceiling feels balanced in most rooms.
Near plants or baskets, a wall hanging with a matte finish doesn’t compete for shine. If grouped with other art, leave at least the width of your palm between pieces. This stop items “bleeding” into each other visually and keeps the wall calm.
Quick calm checklist:
- Stick to natural fiber yarn and one neutral rope or cord.
- Keep at least two palm-widths of bare wall around the hanging.
- Use three or fewer colors from the same family.
- Hang above a low item (like a shelf, bench, or basket), not high in empty air.
- Choose a single focal point, shape or texture, not both together.
This approach helps a woven hanging blend into modern or classic rooms, making even a basic DIY feel considered without extra clutter. Try this style over a chair, by a simple lantern, or in a spot where you want a softer finish. For complementary lighting, see soft glow lanterns crafting light that feels like home.
At some point in the process, it’s common for a room to feel off, maybe the wall hanging looks lost on a busy wall or blends in with competing patterns. This is the tipping point: too much detail, too many colors, or crowded placement and the piece starts to feel like craft clutter instead of calm decor. Taking a step back and removing extras, or giving your work more space, is the practical shift that makes the difference.
This change focuses attention and helps a handmade hanging feel solid, not beginner or busy.
Often, the moment you realize something is off comes after the hanging goes up. The wall suddenly feels crowded, or the colors fight with what’s already there. Most homes miss the mark because it’s easy to overdo texture or rush the final placement.
Many people use too many colors or crowd other decorations close to their wall hanging, hoping more is better. The result is a wall that feels heavy, over-designed, or oddly empty in other spots. This matters because even a small mistake in palette or spacing will make a finished DIY look less refined.
Once you pare things back and keep to just one or two focal points, the hanging suddenly looks well placed and clear.
Save this idea for later.
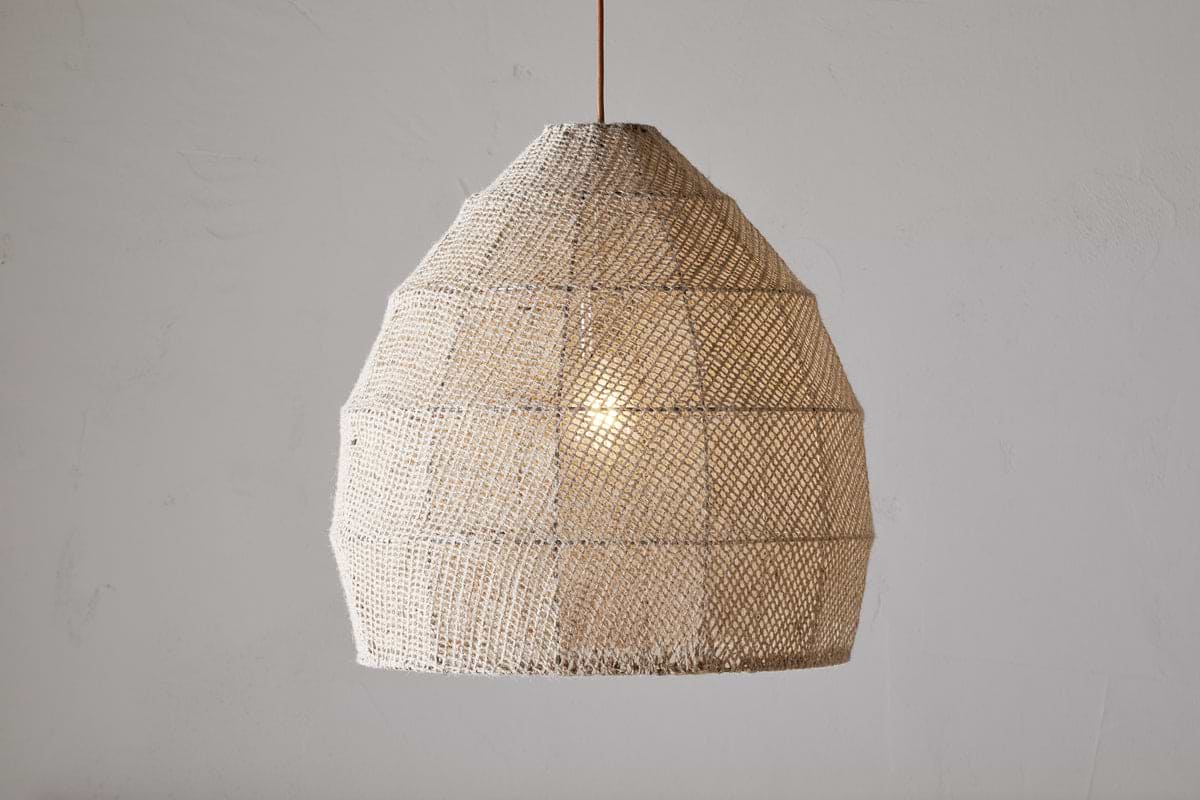
Jahari Woven Jute Pendant – Natural
creates a clear focal pause without crowding the wall.
What tends to hold up with simple weaving projects
Reviewing dozens of room photos and reader tips, a few patterns stand out. The most successful wall hangings always use natural fibers for warmth and limit the number of visible elements, which keeps the piece structured and easy to pair with other decor. Designers often suggest matte finishes, these show less glare, especially near windows, and stand up well to changing daylight.
It’s also notable that slightly heavier yarns keep their shape over time, while finer thread can stretch and look thin. The simplest change, leaving more blank wall and not crowding your art, keeps a handmade weaving from turning into “visual noise.”
, Mara, Loom & Glow
Common questions
What materials do I need to make a woven wall hanging as a beginner?
You do not need much experience or uncommon tools to start weaving a wall hanging-just basic supplies and natural fibres do the job. Simple cardboard looms and a kitchen fork work for most styles.
What simple designs work best for beginners making woven wall hangings?
Blocks, stripes, and fringe all work with basic weaving skills and a tight material range. Geometry, not complex patterns, keeps the look neat and forgiving for a first project.
How do I avoid making a woven wall hanging look cluttered?
Pick a single focus, such as one shape or colour, and keep space around it. Empty space is as important as what you weave in.
what is a woven wall hanging called?
A woven wall hanging is made from natural-fiber materials like wool, cotton cords, jute twine, and linen threads, using simple designs such as blocks, stripes, and fringe with a tight colour palette of no more than one accent colour added to a cream or tan base.
Explore more calm combinations inside our
Shop The Look
.
Free guide
The Calm Leaf
12 quiet ways to bring dried botanicals, stems, and natural textures into calm spaces.